Friday, September 30, 2011

Game Day Doggie Gear

Do you have a dog that loves watching football or baseball games with you? Maybe your dog is more of a die-hard fan than you are, but you can't tell because he or she is lacking the appropriate game day wear. Fortunately, I have a very easy solution for you.

I made mine for my dog Bailey. We live in South Carolina and Bailey attends many tailgating events with us, so I made him a Gamecock bandana. For those of you Minnesota readers don't turn away yet, you can easily make this for your doggie Twins fan.

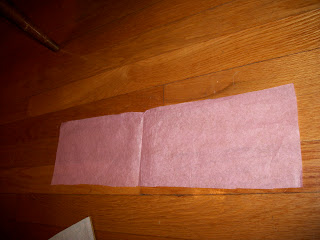
Step 1: Cut out your fabric. I used Bailey's current collar as a measure of how to cut it out.


Step 2: Take out your crafters paint (I used acrylic) and paint your first letter. "S" for Gamecock fans and "T" for Twins fans.


Step 3: Both Twins and Gamecocks fans paint a "C" on top of your first letter.


Step 4: Let dry and tie around your dog's neck


Happy Game Day!!! 

Thursday, September 29, 2011

Oh for the love of Headbands

Do you often move about in your day-to-day lives with your hair in your face? Are you considering shaving your head because of your annoyance with the hair attached to your scalp? Well DON'T!! I have a solution for you!

Here's a way to solve your woes in a way that is both functional and stylish:

Step 1: Buy a simple skinny headband.

Step 2: Cut 8 or 9 small circles of fabric. My circles were about 1-1 1/2 inches in diameter.


Step 3: Take a circle and fold it in half.


Step 4: Fold in half again.


Step 5: Take out your hot glue gun and glue a little less than half way up your headband.


Step 6: Repeat steps 3 and 4 and glue a couple centimeters down from the first.


Step 7: Keep going through all of your pre-cut circles.


Step 8: Wear with pride!


Happy Headbanding!!

Wednesday, September 28, 2011

Bow Beauty

Forget your long assumptions that bows are only for little girls. Trust me when I say, you can be an adult and have a bow in your hair without looking ridiculous. Here's a no sew way to do so:

Step 1: Cut out four rectangular pieces of fabric.


Step 2: Stack them on top of each other (this is going to give depth to your bow):


Step 3: Cut a very narrow rectangular piece of fabric. This does not have to be the same fabric as before if you so choose.


Step 4: Pinch your stacked pieces of fabric and wrap the long rectangular piece around the center. Hot glue gun into place.


Step 5: Glue the backside of your bow to a hair clip.


Step 6: Wear your bow and let your inner child shine.


Have a bow beautiful day!!

Tuesday, September 27, 2011

Tissue Flowers

Do you have a vase that needs filling, but don't have the money to keep live flowers in it all the time? Well I have a solution for you!! You can make your own bouquet of flowers simply out of tissue paper.

Here's what you do:

Step 1: Cut a long narrow piece of tissue paper.


Step 2: Fold your paper in half about four or five times and cut a rounded tip at one end.


Step 3: Unfold.


Step 4: Fold again, but make sure the fold creases do not line up. Like so:


Step 5: Fold four or five times again and cut a new rounded tip on the other side.


Step 6: Unfold again.


Step 7: Fold tissue paper in half "hotdog style" and tie one corner together with some kind of string.


Step 7: Begin wrapping the tissue paper to look like a flower.


Step 8: When finished wrapping the tissue paper, tie another piece of string around the base to hold everything together.


Nice Work!! Now, I'm going to throw another, easier, kind of flower at you.

Step 1: Take a piece of scrapbook paper, card-stock, or whatever else (I used a leftover book page from our book wreath) and cut it into a circle.


Step 2: Make cuts nearly to the center all the way around it.


Step 3: Glue a button or bead to the center and fray out the petals.

I put these flowers together with the tissue flowers to make this framed picture:


This picture sits next to my vase of tissue paper flowers.


Whenever working with tissue paper remember.... tissue paper is not used for blowing your nose!

Enjoy!

Monday, September 26, 2011

If The Shoe Fits

A while ago I purchased a cute pair of pink sandals that had a pink flower in the center. While trying them on at the store I did not notice anything uncomfortable about them, but alas, I was wrong. After a few weeks of wearing them the metal piece that secured the flowers in place began scratching the top of my feet.  Unfortunately, it was bad enough that I had to take the flower off leaving a little hole in each sandal.


Here's what I did to fix things:

Step 1: Grab your glue gun and some beads. Begin glueing the beads into place on your shoe.


Step 2: Glue all the beads into place.


Step 3: Secure all the beads in place by taking a needle and some thread. Start at one end and thread your beads in place.


Step 4: Repeat with your second shoe and you have a beautiful matching set of sandals.


(I thought about modeling these on my feet for this picture and decided that may turn readers away from this blog)

Happy Monday and Happy Crafting.

Thursday, September 22, 2011

Cardigan Brooch

In honor of the first day of fall (tomorrow the 23rd), it is our duty to make a cardigan brooch. Yes, even you males out there can make this and give it to a special female friend. Hey lads, this may be your chance to swoon over the lady at the other side of your office or classroom that you have been staring at for some time now.

Heres what you do...

Step 1: Cut a small circle out of felt. Mine was about two inches in diameter.


Step 2: Cut out a bunch of small petals (really, cut out a bunch of small ovals) out of whatever fabric you choose. I needed nearly thirty of them to complete my brooch.


Step 3: Begin glueing them down to the outer edge of your felt circle.


Step 4: After you finish the outer circle start another ring of petals a couple centimeters in.


Step 5: The size of your felt will determine how many rings of petals you will need. I ended up with three rings. Add a button or bead to the center.


Step 6: Cut a small square of felt (smaller than your original felt circle) and glue it to a safety pin.


Step 7: Glue your square felt piece to the bottom side of your flower.


Step 8: Pin to your cardigan and show off your talents!


Happy Fall!!

Wednesday, September 21, 2011

Magazines: They're Not Just For Reading Anymore

Do you have a stack of old Cosmo or People magazines that you don't need anymore, but can't bring yourself to throw away? Well, I have a remedy for you! Starting now you can turn them into bracelets for you, your friends, and your family!

The following are the only ingredients you need for this craft:

Hot Glue Gun (as with any craft I do)
Scotch Tape
Velcro
Magazines (actually only two pages)

Step 1: Tear out a page in your magazine. You preferably will want to tear out a page that has full color on one side. Start in a corner and begin folding.


Step 2: Keep folding through the entire page. You will finish at the opposite corner in which you began, here take and small piece of scotch tape and adhere the corner down.


Step 3: Begin rolling the strip at one end into a coil. This will become your flower.


Step 4: When you come to the end of the roll either tape or hot glue the end of the strip down. You have created your flower.


Step 5: Tear out another magazine page and repeat steps 1 and 2. Hot glue the center of the flower down to the center of the new strip. Wrap the strips around your wrist to find how much extra of the strip you need to cut off.

Step 6: Use your hot glue gun again to glue on a small piece of velcro to each side.


Step 7: You now have your very own magazine bracelet! I added some blue felt leaves to mine, you can do the same if you wish!


Happy Crafting!!